How to install One-Touch Inspection Door Related Content for One-Touch Inspection Door
How to install One-Touch Inspection Doors with easy to understand movies and illustrations.
Installation procedure for One-Touch Inspection Door
Tsubaki One-Touch Inspection Door is a dust- and rain-tight inspection and service door for conveyors, as well as processing and handling equipment.
These pre-fabricated units are ready-to-go for easy installation at the job-site. Once in place, One-Touch Inspection Door allows for quick and simple inspection without the need for special tools: just lift the lever! No bolts to loosen and no covers to misplace. One touch is all it takes...it’s that simple.
Example of Installation of One-Touch Inspection Door
Solidly weld the frame to the surface.
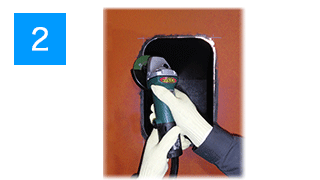
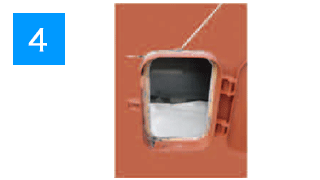
Torch burn the center to create an inspection port (Be sure to grind the burr off edges.)
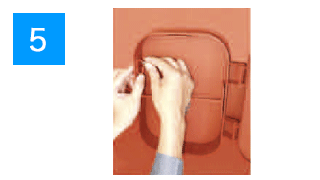
Apply the gasket and attach the lever.
Example of Installation of One-Touch Inspection Door door Parts
Door parts are available for replacement of decrepit or damaged existing doors.
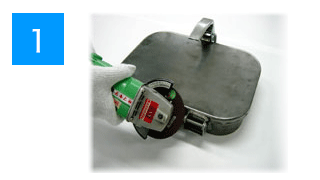
Grind the spot-welded part of the hinge pin on the existing door, and remove the door after pulling the pin out.
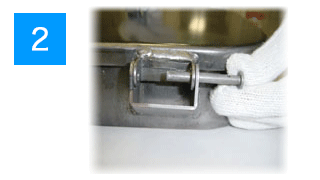
Replace the door with a new one and insert a hinge pin.
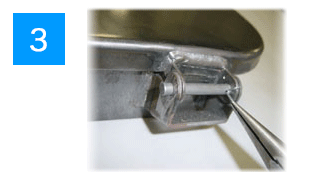
Insert a cotter pin to prevent pin drop-out into the hinge pin and bend it.
- One door, two pins for the door attachment, and two cotter pins to prevent pin drop-out come as a set. Gaskets are not included.
- Note that doors designed for transparent windowed and pressure resistant types are not available.
Example of Installation of Residue Prevention Type One-Touch Inspection Door (Z type)

Cut out the side of the casing (chute) to the specified dimensions. See the catalog for detailed opening dimensions.
Grind the opening after chamfering it.

Fix the frame with a vise or other tools, then tack weld it.
Continuously weld the entire circumference of the frame. (Straighten it if needed.)
Adjust the length of the accompanying chain to prevent inner door dropping to fit the handle and lock washer.

Attach the accompanying chain to prevent inner door dropping to the handle and lock washer to finish.
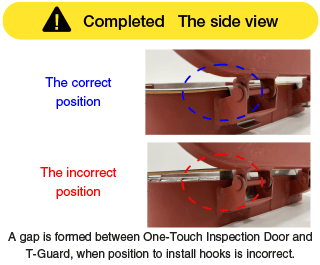
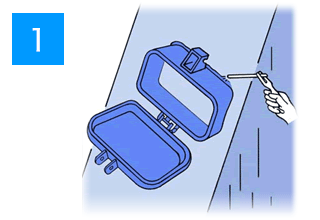
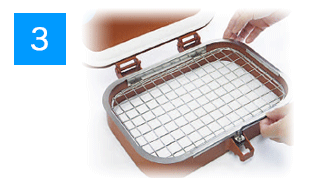
Example of installation of T-Guard One-Touch Inspection Door (safety series screen that can be attached later)
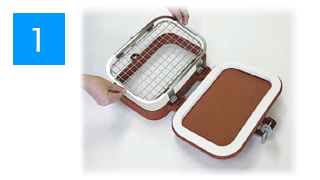
Hang hooks from the hinges and set the screen on the frame.
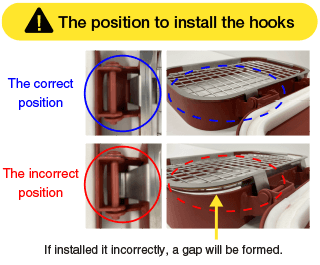
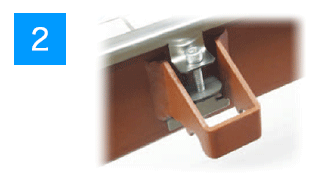
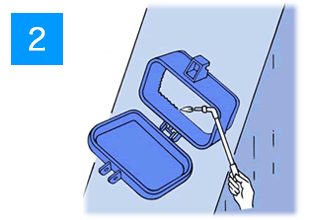
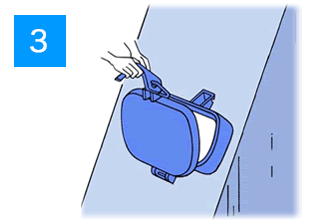
Be sure to tightly attach the brackets to the frame.
Tighten the bolt with a Hex wrench. Note: Be sure to tightly fasten bolts.